

TestNG Tutorial: A Guide to TestNG Framework for Java Testing

1. What is TestNG Framework?
TestNG is a testing framework for Java that simplifies and enhances the process of writing and running tests. TestNG stands for "Next Generation Testing" and is designed to cover all categories of tests, including unit, functional, end-to-end, and integration tests. It was inspired by JUnit and NUnit but provides additional features and flexibility.
We'll learn about all the interesting features of the TestNG Framework in this TestNG Tutorial.
Table of Content
1. Introduction to TestNG
2. TestNG Annotations
- What is TestNG Framework?
- Benefits of TestNG
- TestNG vs. JUnit
- Install TestNG in Eclipse
3. TestNG Test Configuration
- 2.1 @Test Annotation
- 2.1.1 Priority
- 2.1.2 Skipping Tests - Enabled
- 2.1.3 Test Dependency - DependensOnMethods
- 2.1.4 Groups
- 2.1.5 Timeout
- 2.2 Configuration Annotations
- 2.2.1 @BeforeSuite and @AfterSuite
- 2.2.2 @BeforeTest and @AfterTest
- 2.2.3 @BeforeClass and @AfterClass
- 2.2.4 @BeforeMethod and @AfterMethod
- 2.3 Additional Annotations
- 2.3.1 @DataProvider
- 2.3.2 @Parameters
- 2.3.3 @Factory
- 2.3.4 @Listeners
4. Parameterization in TestNG
- 3.1 TestNG XML Configuration
- 3.2 Suite Configuration
- 3.3 Test Configuration
- 3.4 Class Configuration
- 3.5 Method Configuration
5. TestNG Assertions
- 4.1 Parameterizing Test Methods
- 4.2 Parameterizing Test Classes
- 4.3 Parameterizing Test Suites
6. TestNG Parallel Execution
- 5.1 Using Assertions in TestNG
- 5.2 Asserting Exceptions
7. TestNG Reporting and TestNG Plugins
- 6.1 Configuring Parallel Execution
- 6.2 Parallel Test Methods
- 6.3 Parallel Test Classes
- 6.4 Parallel Test Suites
8. TestNG Integration with Selenium
- 7.1 Default HTML Reports
- 7.2 Generating Customized Test Reports
- 7.3 TestNG Plugins and Extensions
- 8.1 Setting Up Selenium with TestNG
- 8.2 Writing Selenium Test Cases with TestNG
- 8.3 Running Selenium Tests with TestNG
- 8.4 Data-Driven Testing with Selenium and TestNG
9. TestNG Listeners
- 9.1 Introduction to TestNG Listeners
- 9.2 Implementing TestNG Listeners
- 9.3 TestNG Listener Annotations
- 9.4 Taking Screenshots on Test Failure
- 9.5 TestNG Listener Configuration
10. TestNG Data Providers
- 10.1 Understanding Data Providers
- 10.2 Creating Data Providers
- 10.3 Data Provider Parameters
- 10.4 Data Provider with Excel
- 10.5 Data Provider with CSV
11. TestNG Page Factory
12. TestNG and Continuous Integration
- 12.1 Integrating TestNG with Jenkins
- 12.2 Running TestNG Tests in CI/CD Pipeline
- 12.3 Configuring TestNG in Maven
1.1. Key features of TestNG include
1. Annotation-based: TestNG allows you to use annotations to define test methods, configure test execution, and manage test dependencies. Annotations provide a way to define pre- and post-test actions, setup and teardown methods, and more.
2. Parallel Test Execution: TestNG supports parallel test execution, allowing you to run tests in parallel on multiple threads or even on multiple machines. This can significantly reduce test execution time and provide faster feedback.
3. Flexible Test Configuration: TestNG provides various configuration options through XML or Java-based configuration files. You can define test suites, test groups, test dependencies, and more, allowing you to customize and control the test execution flow.
4. Data-Driven Testing: TestNG supports data-driven testing, where you can supply different sets of test data to a test method and execute it multiple times with different inputs. This is useful for testing various scenarios with different data sets.
5. TestNG Assertions: TestNG provides a rich set of assertion methods that allow you to validate the expected behavior of your application under test. Assertions help in verifying the correctness of test results and identifying failures.
1.2 Benefits of TestNG
TestNG offers several benefits over traditional testing frameworks like JUnit:
1. Powerful Annotations: TestNG's annotations provide more flexibility and control over test execution compared to JUnit. Annotations like @BeforeSuite, @AfterSuite, @BeforeTest, @AfterTest, @BeforeClass, @AfterClass, @BeforeMethod, and @AfterMethod allow you to define setup and teardown methods at various levels.
2. Parallel Test Execution: TestNG allows you to run tests in parallel, which can significantly reduce test execution time, especially for large test suites. It supports parallel execution at the method, class, or suite level, enabling faster feedback.
3. Test Configuration Flexibility: TestNG provides multiple configuration options, including XML-based configuration files and programmatic configuration using Java classes. This flexibility allows you to define test suites, test dependencies, test groups, and more, according to your specific testing requirements.
4. Data-Driven Testing: TestNG's data-driven testing capabilities enable you to test your application with multiple data sets. This is particularly useful for parameterized testing, where you can test a single piece of functionality with various input combinations.
5. Reporting and Test Output: TestNG generates detailed test reports that provide comprehensive information about test execution, including test results, test timings, failures, and more. These reports can be customized and integrated with other reporting frameworks for better visibility into test results.
1.3 TestNG vs. JUnit
While both TestNG and JUnit are popular testing frameworks for Java, there are some notable differences:
Features TestNG JUnit Annotation Support Provides a rich set of annotations for test configuration, setup, and teardown methods. Offers a set of annotations for test configuration and lifecycle methods. Parallel Execution Built-in support for parallel test execution, allowing tests to run concurrently. Requires additional libraries or plugins for parallel test execution. Test Configuration Offers extensive configuration options through XML-based configuration files and programmatic configuration. Relies primarily on annotations for test configuration and doesn't have built-in XML-based configuration. Data-Driven Testing Built-in support for data-driven testing, enabling tests to be executed with multiple data sets. Requires additional libraries or custom code to achieve data-driven testing. Reporting Generates detailed HTML reports by default, providing comprehensive test execution information. Relies on third-party libraries or plugins for generating reports. Flexibility Provides more flexibility in defining test suites, test dependencies, and customizing test execution flow. Offers less flexibility compared to TestNG. Popularity Widely used in enterprise-level testing and preferred by some automation frameworks. Popular for unit testing and widely used in the Java community.
It's important to note that both TestNG and JUnit are powerful testing frameworks with their own strengths and capabilities. The choice between them depends on the specific needs and preferences of the testing project.
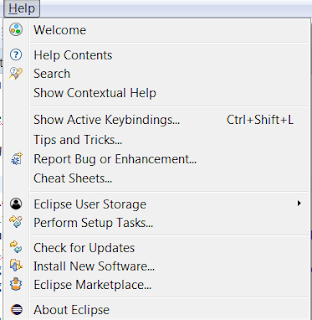
1.4. Installing TestNG in Eclipse
- Open Eclipse.
- Click on the 'Help' menu option.
- Click on "Eclipse Marketplace"

2. TestNG Annotations
TestNG provides a set of annotations that allow you to control the behavior and execution flow of your tests. In this tutorial, we will explore the different annotations provided by TestNG and their usage.
2.1. @Test Annotation
The @Test annotation is the most commonly used annotation in TestNG. It marks a method as a test method. Here's an example:
java@Test
public void testMethod() {
// Test logic goes here
}You can add additional attributes to the @Test annotation to customize the behavior of the test method, such as:
2.2. Attributes of @Test Annotation
I. What is Priority in TestNG?
The priority attribute is used to define the execution priority of the test method. Test methods with higher priority values are executed first. The default priority is 0 if not specified.
java@Test(priority = 1)
public void highPriorityTest() {
// Test logic goes here
}
@Test(priority = 2)
public void mediumPriorityTest() {
// Test logic goes here
}
@Test(priority = 3)
public void lowPriorityTest() {
// Test logic goes here
}Example Code for Priority in TestNG:
Here's an example code snippet that demonstrates the usage of the @Test annotation with the priority the attribute in TestNG:
javaimport org.testng.annotations.Test;
public class TestngPriority {
@Test(priority = 0)
public void one() {
System.out.println("This is test case 1");
}
@Test(priority = 2)
public void two() {
System.out.println("This is test case 2");
}
@Test(priority = 1)
public void three() {
System.out.println("This is test case 3");
}
@Test(priority = 3)
public void four() {
System.out.println("This is test case 4");
}
}In the above code, we have a test class TestngPriority with four test methods: one(), two(), three(), and four(). Each test method is annotated with the @Test annotation, and we have specified the priority attribute for each method.
Based on the specified priorities, TestNG will execute the test methods in the ascending order of their priorities. In this case, the output of the test execution will be as follows:
bashThis is test case 1
This is test case 3
This is test case 2
This is test case 4As you can see, the test methods are executed in the order defined by their priorities: 0, 1, 2, and 3.
The @Test annotation with the priority attribute allows you to control the order in which test methods are executed, ensuring that tests with higher priorities are executed first. This can be useful when you have dependencies between test methods or when you want to prioritize certain tests based on their significance.
II. enabled in TestNG
The enabled attribute controls whether the test method should be executed or skipped. By default, the value is true, which means the test method is enabled for execution. If set to false, the test method will be skipped.
java@Test(enabled = false)
public void disabledTestMethod() {
// This test method will be skipped
}
@Test
public void enabledTestMethod() {
// This test method will be executed
}If you execute the tests using TestNG's test runner, you will see the following output in the console:
markdown===============================================
Default Suite
Total tests run: 2, Failures: 0, Skips: 1
===============================================In this case, the disabledTestMethod() will be skipped because it has the enabled attribute set to false, and the enabledTestMethod() will be executed.
The output indicates that 2 tests were run in the default test suite, with no failures and 1 skip.
III. dependsOnMethods in TestNG
The dependsOnMethods the attribute allows you to specify dependencies between test methods. It ensures that a test method is executed only if the specified dependent methods have passed successfully.
java@Test
public void loginTest() {
// Test logic for login
}
@Test(dependsOnMethods = "loginTest")
public void dashboardTest() {
// Test logic for dashboard functionality
}In the example above, the dashboardTest method will only be executed if the loginTest method has passed successfully.
Example Code:
Here's an example code snippet that demonstrates method dependencies in TestNG:
javaimport org.testng.annotations.Test;
public class TestngDependencies {
@Test
public void openBrowser() {
System.out.println("Opening the browser");
}
@Test(dependsOnMethods = "openBrowser")
public void signIn() {
System.out.println("Signing in");
}
@Test(dependsOnMethods = {"openBrowser", "signIn"})
public void logOut() {
System.out.println("Logging out");
}
}Program Explanation:
In the above code, we have a test class TestngDependencies with three test methods: openBrowser(), signIn(), and logOut(). We have specified the method dependencies using the dependsOnMethods attribute of the @Test annotation.
- The
signIn()method is dependent on theopenBrowser()method, so it will be executed only if theopenBrowser()method has passed successfully. - The
logOut()method is dependent on both theopenBrowser()andsignIn()methods, so it will be executed only if both theopenBrowser()andsignIn()methods have passed successfully.
When you execute the test methods, TestNG will ensure that the dependencies are satisfied and execute the methods accordingly. The output of the test execution will be as follows:
csharpOpening the browser
Signing in
Logging outAs you can see, the methods are executed in the order defined by their dependencies: openBrowser(), signIn(), and logOut().
IV. groups in TestNG
The groups attribute is used to assign test methods to one or more groups. Groups are used for grouping and filtering tests. You can specify multiple groups by separating them with commas.
java@Test(groups = "smoke")
public void smokeTest() {
// Test logic goes here
}
@Test(groups = {"sanity", "regression"})
public void sanityAndRegressionTest() {
// Test logic goes here
}You can then specify which groups of tests to include or exclude when running tests using TestNG configuration.
xml<test name="MyTest">
<groups>
<run>
<include name="smoke" />
</run>
</groups>
</test>In the above example, only the test method with the smoke group will be executed.
Here's an example code snippet to demonstrate the usage of groups in TestNG:
javaimport org.testng.annotations.Test;
public class TestngGroups {
@Test(groups = "smoke")
public void smokeTest1() {
System.out.println("Executing smoke test 1");
}
@Test(groups = "smoke")
public void smokeTest2() {
System.out.println("Executing smoke test 2");
}
@Test(groups = "regression")
public void regressionTest1() {
System.out.println("Executing regression test 1");
}
@Test(groups = {"regression", "sanity"})
public void regressionAndSanityTest() {
System.out.println("Executing regression and sanity test");
}
}In the above code, we have a test class TestngGroups with four test methods. Each test method is assigned to one or more groups using the groups attribute of the @Test annotation.
smokeTest1()andsmokeTest2()are assigned to thesmokegroup.regressionTest1()is assigned to theregressiongroup.regressionAndSanityTest()is assigned to both theregressionandsanitygroups.
Now, when executing the tests, you can include or exclude specific groups to control which tests are executed. This can be done using TestNG configuration, such as testng.xml or programmatically.
For example, if you want to execute only the tests in the smoke group, you can include the group in the configuration as follows:
xml<test name="SmokeTests">
<groups>
<run>
<include name="smoke" />
</run>
</groups>
<classes>
<class name="com.example.TestngGroups" />
</classes>
</test>In this case, only the smokeTest1() and smokeTest2() methods will be executed.
On the other hand, if you want to execute the tests in the regression group but exclude the sanity group, you can configure it as follows:
xml<test name="RegressionTests">
<groups>
<run>
<include name="regression" />
<exclude name="sanity" />
</run>
</groups>
<classes>
<class name="com.example.TestngGroups" />
</classes>
</test>In this case, the regressionTest1() and regressionAndSanityTest() methods will be executed, but the regressionAndSanityTest() method will not be considered part of the test run because it is also assigned to the sanity group.
2.2 Configuration Annotations
TestNG provides several configuration annotations that allow you to define setup and teardown methods for different levels of test execution. These annotations help you perform specific actions before and after test suites, tests, classes, and methods. Let's explore each of these annotations in detail.
2.2.1 @BeforeSuite and @AfterSuite
The @BeforeSuite and @AfterSuite annotations are used to define setup and teardown methods that run before and after the entire suite execution, respectively. These methods are executed only once per suite.
Example:
javaimport org.testng.annotations.BeforeSuite;
import org.testng.annotations.AfterSuite;
public class SuiteLevelConfig {
@BeforeSuite
public void beforeSuiteSetup() {
// Perform setup steps before the suite
System.out.println("BeforeSuite: Setting up the suite");
}
@AfterSuite
public void afterSuiteTeardown() {
// Perform teardown steps after the suite
System.out.println("AfterSuite: Tearing down the suite");
}
}2.2.2 @BeforeTest and @AfterTest
The @BeforeTest and @AfterTest annotations are used to define setup and teardown methods that run before and after each test tag in the TestNG XML configuration file, respectively. These methods are executed once per test tag.
Example:
javaimport org.testng.annotations.BeforeTest;
import org.testng.annotations.AfterTest;
public class TestLevelConfig {
@BeforeTest
public void beforeTestSetup() {
// Perform setup steps before each test
System.out.println("BeforeTest: Setting up the test");
}
@AfterTest
public void afterTestTeardown() {
// Perform teardown steps after each test
System.out.println("AfterTest: Tearing down the test");
}
}2.2.3 @BeforeClass and @AfterClass
The @BeforeClass and @AfterClass annotations are used to define setup and teardown methods that run before and after each test class, respectively. These methods are executed once per test class.
Example:
javaimport org.testng.annotations.BeforeClass;
import org.testng.annotations.AfterClass;
public class ClassLevelConfig {
@BeforeClass
public void beforeClassSetup() {
// Perform setup steps before the class
System.out.println("BeforeClass: Setting up the class");
}
@AfterClass
public void afterClassTeardown() {
// Perform teardown steps after the class
System.out.println("AfterClass: Tearing down the class");
}
}2.2.4 @BeforeMethod and @AfterMethod
The @BeforeMethod and @AfterMethod annotations are used to define setup and teardown methods that run before and after each test method, respectively. These methods are executed once per test method.
Example:
javaimport org.testng.annotations.BeforeMethod;
import org.testng.annotations.AfterMethod;
public class MethodLevelConfig {
@BeforeMethod
public void beforeMethodSetup() {
// Perform setup steps before each test method
System.out.println("BeforeMethod: Setting up the method");
}
@AfterMethod
public void afterMethodTeardown() {
// Perform teardown steps after each test method
System.out.println("AfterMethod: Tearing down the method");
}
}
2.3. Additional Annotations:
- @DataProvider
- @Parameters
- @Factory
- @Listeners
3. TestNG Test Configuration
TestNG provides a flexible and powerful way to configure your test execution through XML configuration files. In this tutorial, we will explore the different levels of test configuration available in TestNG: XML configuration, suite configuration, test configuration, class configuration, and method configuration.
3.1. TestNG XML Configuration
The TestNG XML configuration file allows you to define the overall configuration of your test suite. It serves as the entry point for configuring and executing your tests. Here are the key aspects of TestNG XML configuration:
- Test Suite: The XML configuration file represents a test suite, which can contain multiple test tags.
- Test Classes: Within each test tag, you can specify the classes to be included for test execution.
- Test Parameters: You can define parameters at the suite level and pass them to your test methods or classes.
- Parallel Execution: TestNG XML allows you to specify parallel execution settings, such as parallel test execution, thread count, and parallel test instances.
Example TestNG XML Configuration (testng.xml):
xml<!DOCTYPE suite SYSTEM "https://testng.org/testng-1.0.dtd">
<suite name="MyTestSuite" parallel="tests" thread-count="5">
<test name="LoginTests" preserve-order="true">
<parameter name="username" value="testuser" />
<parameter name="password" value="testpassword" />
<classes>
<class name="com.example.LoginTest" />
</classes>
</test>
<test name="RegistrationTests">
<classes>
<class name="com.example.RegistrationTest" />
</classes>
</test>
</suite>3.2. Suite Configuration
The suite configuration allows you to customize the behavior of a specific test suite. It is defined within the <suite> tag in the XML configuration file. Here are some common settings you can configure at the suite level:
I. Suite Name: You can set a name for your test suite using the name attribute.
<parameter> tag.Here's an example that demonstrates how to use Suite Parameters in TestNG:
javaimport org.testng.annotations.Test;
import org.testng.annotations.BeforeSuite;
import org.testng.annotations.Parameters;
public class SuiteParametersExample {
@BeforeSuite
@Parameters({ "browser", "environment" })
public void setupSuite(String browser, String environment) {
System.out.println("Suite Setup - Browser: " + browser + ", Environment: " + environment);
// Additional setup logic for the suite
}
@Test
public void testMethod() {
System.out.println("Executing testMethod()");
// Test logic goes here
}
}In the above example, we have a @BeforeSuite annotated method called setupSuite. The @Parameters annotation is used to specify the suite-level parameters. In this case, we have defined two parameters: browser and environment. The values for these parameters are specified in the TestNG XML configuration file (testng.xml).
To use Suite Parameters, you need to define them in the TestNG XML configuration file as shown below:
xml<!DOCTYPE suite SYSTEM "https://testng.org/testng-1.0.dtd">
<suite name="MyTestSuite" parallel="tests" thread-count="5">
<parameter name="browser" value="Chrome" />
<parameter name="environment" value="Production" />
<test name="LoginTests">
<classes>
<class name="com.example.SuiteParametersExample" />
</classes>
</test>
</suite>In the XML configuration above, we have defined the suite parameters using the <parameter> tag within the <suite> tag. Each parameter has a name and a value associated with it.
When you execute the test suite, TestNG will inject the values specified in the XML configuration into the setupSuite method's parameters. In this example, the browser parameter will be set to "Chrome" and the environment parameter will be set to "Production". You can then use these values within the setupSuite method or any other suite-level methods as needed.
onStart and onFinish.Here's an example that demonstrates how to use a Suite Level Listener in TestNG:
javaimport org.testng.ISuite;
import org.testng.ISuiteListener;
public class SuiteListener implements ISuiteListener {
@Override
public void onStart(ISuite suite) {
System.out.println("Suite Started: " + suite.getName());
// Additional setup logic for the suite
}
@Override
public void onFinish(ISuite suite) {
System.out.println("Suite Finished: " + suite.getName());
// Additional teardown logic for the suite
}
}In the above example, we implement the ISuiteListener interface and override the onStart and onFinish methods. These methods will be called by TestNG when the suite starts and finishes its execution, respectively.
To use the Suite Level Listener, you need to specify it in the TestNG XML configuration file (testng.xml). Here's an example:
xml<!DOCTYPE suite SYSTEM "https://testng.org/testng-1.0.dtd">
<suite name="MyTestSuite" parallel="tests" thread-count="5">
<listeners>
<listener class-name="com.example.SuiteListener" />
</listeners>
<test name="LoginTests">
<classes>
<class name="com.example.LoginTest" />
</classes>
</test>
<test name="RegistrationTests">
<classes>
<class name="com.example.RegistrationTest" />
</classes>
</test>
</suite>In the above XML configuration, we have added the <listeners> tag within the <suite> tag. Inside the <listeners> tag, we specify the class name of our Suite Level Listener (com.example.SuiteListener).
When you execute the test suite, the onStart method will be invoked at the beginning of the suite execution, and the onFinish method will be called at the end of the suite execution. You can add your additional setup and teardown logic inside these methods.
By using Suite Level Listeners, you can handle suite-level events and perform any necessary actions specific to the entire suite. This can be useful for tasks such as setting up common resources, generating reports, or cleaning up after the suite execution.
3.3. Test Configuration
The test configuration allows you to configure individual tests within a test suite. It is defined within the <test> tag in the XML configuration file. Here are some common settings you can configure at the test level:
- Test Name: You can set a name for your test using the
nameattribute. - Test Parameters: You can define parameters specific to the test using the
<parameter>tag. - Test Level Listener: You can specify a listener class at the test level to handle test-level events.
Example Test Configuration:
javaimport org.testng.annotations.BeforeTest;
import org.testng.annotations.AfterTest;
public class TestConfiguration {
@BeforeTest
public void setupTest() {
System.out.println("Executing setupTest() before the test");
// Additional setup logic goes here
}
@AfterTest
public void teardownTest() {
System.out.println("Executing teardownTest() after the test");
// Additional teardown logic goes here
}
}3.4. Class Configuration
The class configuration allows you to configure specific test classes within a test. It is defined within the <class> tag in the XML configuration file. Here are some common settings you can configure at the class level:
- Class Name: You can specify the fully qualified name of the test class using the
nameattribute. - Class Level Listener: You can specify a listener class at the class level to handle class-level events.
Example Class Configuration:
javaimport org.testng.annotations.BeforeClass;
import org.testng.annotations.AfterClass;
public class LoginTest {
@BeforeClass
public void setupClass() {
System.out.println("Executing setupClass() before the LoginTest class");
// Additional setup logic goes here
}
@AfterClass
public void teardownClass() {
System.out.println("Executing teardownClass() after the LoginTest class");
// Additional teardown logic goes here
}
@Test
public void login() {
System.out.println("Executing login() test method");
// Test logic goes here
}
}3.5. Method Configuration
The method configuration allows you to configure individual test methods within a test class. It is defined within the <methods> tag under the <class> tag in the XML configuration file. Here are some common settings you can configure at the method level:
- Method Name: You can specify the name of the test method using the
<include>tag. - Method Level Listener: You can specify a listener class at the method level to handle method-level events.
Example Method Configuration:
javaimport org.testng.annotations.BeforeMethod;
import org.testng.annotations.AfterMethod;
public class RegistrationTest {
@BeforeMethod
public void setupMethod() {
System.out.println("Executing setupMethod() before each test method");
// Additional setup logic goes here
}
@AfterMethod
public void teardownMethod() {
System.out.println("Executing teardownMethod() after each test method");
// Additional teardown logic goes here
}
@Test
public void registerUser() {
System.out.println("Executing registerUser() test method");
// Test logic goes here
}
@Test
public void verifyEmailConfirmation() {
System.out.println("Executing verifyEmailConfirmation() test method");
// Test logic goes here
}
}4. Parameterization in TestNG
4.1. Parameterizing Test Methods
TestNG provides the @Parameters annotation to parameterize test methods. You can define parameters in your test method and pass values to them using the TestNG XML configuration file. Here's an example:
javaimport org.testng.annotations.Parameters;
import org.testng.annotations.Test;
public class ParameterizedMethodExample {
@Test
@Parameters({ "username", "password" })
public void loginTest(String username, String password) {
// Test logic using the provided username and password
// Assertions, interactions, etc.
}
}In the above example, the loginTest() method is parameterized using the @Parameters annotation. The names of the parameters ("username" and "password") are specified in the annotation, and the actual values are provided through the TestNG XML configuration file.
To pass values to the parameters, you need to define them in the TestNG XML configuration file as shown below:
xml<!DOCTYPE suite SYSTEM "https://testng.org/testng-1.0.dtd">
<suite name="MyTestSuite">
<test name="LoginTests">
<parameter name="username" value="testuser1" />
<parameter name="password" value="password123" />
<classes>
<class name="com.example.ParameterizedMethodExample" />
</classes>
</test>
</suite>In the XML configuration above, the values for the "username" and "password" parameters are specified using the <parameter> tag within the <test> tag.
During test execution, TestNG will inject the provided values from the XML configuration into the test method parameters. This way, you can run the same test method with different data sets by configuring the values in the TestNG XML file.
4.2 Parameterizing Test Classes
TestNG also allows you to parameterize entire test classes using the @Parameters annotation. This is useful when you have multiple test methods in a class that require the same set of parameters. Here's an example:
javaimport org.testng.annotations.Parameters;
import org.testng.annotations.Test;
public class ParameterizedClassExample {
private String username;
private String password;
public ParameterizedClassExample(String username, String password) {
this.username = username;
this.password = password;
}
@Test
public void loginTest() {
// Test logic using the provided username and password
// Assertions, interactions, etc.
}
@Test
public void profileTest() {
// Test logic using the provided username and password
// Assertions, interactions, etc.
}
}In this example, the ParameterizedClassExample class is parameterized using a constructor that takes the username and password as arguments. The @Parameters annotation is used to specify the names of the parameters. The values are provided through the TestNG XML configuration file, similar to the previous example.
To pass values to the parameters, you need to define them in the TestNG XML configuration file as shown below:
xml<!DOCTYPE suite SYSTEM "https://testng.org/testng-1.0.dtd">
<suite name="MyTestSuite">
<test name="LoginTests">
<classes>
<class name="com.example.ParameterizedClassExample">
<parameters>
<parameter name="username" value="testuser1" />
<parameter name="password" value="password123" />
</parameters>
</class>
</classes>
</test>
</suite>In this XML configuration, the values for the "username" and "password" parameters are specified within the <parameters> tag for the respective test class.
During test execution, TestNG will instantiate the test class with the provided values, and all the test methods within the class will have access to those parameter values.
4.3 Parameterizing Test Suites
TestNG allows you to parameterize entire test suites using the <parameter> tag in the TestNG XML configuration file. This enables you to run the same suite with different configurations. Here's an example:
xml<!DOCTYPE suite SYSTEM "https://testng.org/testng-1.0.dtd">
<suite name="MyTestSuite">
<parameter name="browser" value="chrome" />
<parameter name="environment" value="staging" />
<test name="LoginTests">
<classes>
<!-- Test classes go here -->
</classes>
</test>
</suite>In this example, the parameters "browser" and "environment" are defined at the suite level using the <parameter> tag. The values for these parameters can be accessed within the test classes or methods by using the @Parameters annotation.
javaimport org.testng.annotations.Parameters;
import org.testng.annotations.Test;
public class SuiteParameterExample {
@Test
@Parameters({ "browser", "environment" })
public void loginTest(String browser, String environment) {
// Test logic using the provided browser and environment
// Assertions, interactions, etc.
}
}In the above example, the loginTest() method in the SuiteParameterExample class is parameterized using the @Parameters annotation to access the suite-level parameters.
During test execution, TestNG will inject the parameter values from the suite configuration into the test methods or classes that require them, allowing you to run the same suite with different configurations.
5. TestNG Assertions
Assertions and reporting play a crucial role in test automation. They help validate expected outcomes and provide meaningful information about test execution. In this tutorial, we will explore how to use assertions in TestNG for result validation and how to leverage TestNG's reporting capabilities to generate detailed test reports.
5.1 Using Assertions in TestNG
TestNG provides a set of built-in assertions that you can use to validate expected results in your test cases. These assertions are part of the org.testng.Assert class. Here are some commonly used assertions:
assertEquals(expected, actual): Asserts that two values are equal.assertTrue(condition): Asserts that a condition is true.assertFalse(condition): Asserts that a condition is false.assertNull(object): Asserts that an object is null.assertNotNull(object): Asserts that an object is not null.assertSame(expected, actual): Asserts that two objects refer to the same object.assertNotSame(expected, actual): Asserts that two objects do not refer to the same object.
Here's an example that demonstrates the usage of assertions in TestNG:
javaimport org.testng.Assert;
import org.testng.annotations.Test;
public class AssertionExample {
@Test
public void testAddition() {
int result = Calculator.add(2, 3);
Assert.assertEquals(result, 5, "Addition failed");
}
@Test
public void testStringLength() {
String str = "Hello, TestNG";
Assert.assertTrue(str.length() > 0, "String is empty");
}
}In the above example, we use the assertEquals() assertion to verify the result of an addition operation. If the result is not equal to the expected value, an assertion failure message will be displayed.
Similarly, we use the assertTrue() assertion to validate the length of a string. If the condition is not true, an assertion failure message will be displayed.
By using assertions, you can ensure that your test cases produce the expected outcomes and catch any deviations.
5.2 Asserting Exceptions
TestNG allows you to assert the occurrence of exceptions during test execution. This helps validate error scenarios and ensure that exceptions are handled properly. TestNG provides the expectedExceptions attribute in the @Test annotation for asserting exceptions.
Here's an example to illustrate how to assert exceptions in TestNG:
javaimport org.testng.annotations.Test;
public class ExceptionAssertionExample {
@Test(expectedExceptions = ArithmeticException.class)
public void testDivideByZero() {
int result = 10 / 0;
}
@Test(expectedExceptions = NullPointerException.class)
public void testNullPointer() {
String str = null;
int length = str.length();
}
}In the above example, the testDivideByZero() method expects an ArithmeticException to be thrown when dividing by zero. If the exception is thrown, the test passes; otherwise, it fails.
Similarly, the testNullPointer() method expects a NullPointerException to be thrown when attempting to access the length() method on a null string. If the exception is thrown, the test passes; otherwise, it fails.
By using the expectedExceptions attribute, you can assert that specific exceptions are thrown during test execution, allowing you to validate the error handling in your code.
6. TestNG Parallel Execution
Parallel execution is a powerful feature of TestNG that allows you to run your tests concurrently, significantly reducing the overall test execution time. TestNG provides different levels of parallelism, allowing you to parallelize test methods, test classes, and even entire test suites. In this tutorial, we will explore how to configure and leverage parallel execution in TestNG.
6.1 Configuring Parallel Execution
To configure parallel execution in TestNG, you need to specify the parallelism mode in the TestNG XML configuration file. TestNG provides the following parallel execution modes:
methods: Parallel execution at the method level.classes: Parallel execution at the class level.tests: Parallel execution at the test level.instances: Parallel execution at the instance level.
To configure parallel execution, add the parallel attribute to the <suite> tag in the TestNG XML file. Here's an example:
xml<!DOCTYPE suite SYSTEM "https://testng.org/testng-1.0.dtd">
<suite name="MyTestSuite" parallel="methods">
<!-- Test configurations go here -->
</suite>In the above example, the parallel execution mode is set to methods, which means that the test methods will be executed in parallel.
6.2 Parallel Test Methods
TestNG allows you to parallelize the execution of individual test methods. To achieve parallel execution at the method level, you can use the parallel attribute in the <test> tag in the TestNG XML configuration file. Here's an example:
xml<!DOCTYPE suite SYSTEM "https://testng.org/testng-1.0.dtd">
<suite name="MyTestSuite">
<test name="MyTest" parallel="methods">
<classes>
<class name="com.example.MyTestClass" />
</classes>
</test>
</suite>In the above example, the test methods within the MyTestClass class will be executed in parallel.
6.3 Parallel Test Classes
TestNG also allows you to parallelize the execution of entire test classes. To achieve parallel execution at the class level, you can use the parallel attribute in the <classes> tag in the TestNG XML configuration file. Here's an example:
xml<!DOCTYPE suite SYSTEM "https://testng.org/testng-1.0.dtd">
<suite name="MyTestSuite">
<test name="MyTest">
<classes parallel="classes">
<class name="com.example.MyTestClass1" />
<class name="com.example.MyTestClass2" />
</classes>
</test>
</suite>In the above example, the MyTestClass1 and MyTestClass2 will be executed in parallel.
6.4 Parallel Test Suites
TestNG also provides the capability to execute multiple test suites in parallel. Each test suite can have its own configuration and set of tests. To achieve parallel execution at the suite level, you can run multiple test suites simultaneously.
Here's an example to illustrate parallel execution of multiple test suites:
xml<!DOCTYPE suite SYSTEM "https://testng.org/testng-1.0.dtd">
<suite name="Suite1" parallel="tests">
<!-- Suite1 test configurations go here -->
</suite>
<!DOCTYPE suite SYSTEM "https://testng.org/testng-1.0.dtd">
<suite name="Suite2" parallel="tests">
<!-- Suite2 test configurations go here -->
</suite>In the above example, Suite1 and Suite2 will be executed in parallel.
7. TestNG Reporting and TestNG Plugins
TestNG provides robust reporting capabilities that allow you to generate detailed test reports, track test execution results, and gather valuable insights about your test suite. In addition, TestNG supports the use of plugins and extensions, which can further enhance the reporting capabilities and provide additional features. In this tutorial, we will explore the default HTML reports generated by TestNG, how to generate customized test reports, and the concept of TestNG plugins and extensions.
7.1. Default HTML Reports
TestNG generates default HTML reports that provide comprehensive information about the test execution, including test results, execution times, and failures. These reports are automatically generated after test execution and can be found in the test-output folder within your project directory.
The default HTML reports include the following sections:
- Summary: Provides an overview of the test suite, including the total number of tests executed, passed, failed, and skipped.
- Test Cases: Lists all the test cases executed during the test run, along with their status (pass/fail/skip), execution time, and associated groups.
- Configuration Methods: Displays the configuration methods (
@BeforeSuite,@BeforeTest, etc.) executed before and after the test suite, test classes, and test methods. - Logs: Shows detailed logs of the test execution, including system out and system error messages.
The default HTML reports are generated automatically, requiring no additional configuration. They provide a good starting point for analyzing test results and identifying issues.
7.2. Generating Customized Test Reports
TestNG allows you to generate customized test reports by integrating with external reporting frameworks or by implementing custom listeners. This gives you the flexibility to tailor the reports to your specific requirements and enhance their visual appeal.
To generate customized test reports, you can implement a custom TestNG listener by extending the org.testng.ITestListener interface. This listener can capture various events during test execution, such as test start, test success, test failure, and test skipped. Within the listener, you can write custom logic to generate and format the desired report.
Here's an example of a custom TestNG listener that generates a simple customized report:
javaimport org.testng.ITestContext;
import org.testng.ITestListener;
import org.testng.ITestResult;
public class CustomTestListener implements ITestListener {
@Override
public void onStart(ITestContext context) {
// Initialization code for report generation
}
@Override
public void onTestStart(ITestResult result) {
// Logic to capture test start event
}
@Override
public void onTestSuccess(ITestResult result) {
// Logic to capture test success event
}
@Override
public void onTestFailure(ITestResult result) {
// Logic to capture test failure event
}
@Override
public void onTestSkipped(ITestResult result) {
// Logic to capture test skipped event
}
@Override
public void onFinish(ITestContext context) {
// Finalize report generation and cleanup code
}
}To use the custom listener, you need to add it to the TestNG XML configuration file:
xml<!DOCTYPE suite SYSTEM "https://testng.org/testng-1.0.dtd">
<suite name="MyTestSuite">
<listeners>
<listener class-name="com.example.CustomTestListener" />
</listeners>
<!-- Test configurations go here -->
</suite>In this example, the CustomTestListener captures different test events and performs custom actions based on those events. You can modify the logic inside each method to generate your desired report.
7.3 TestNG Plugins and Extensions
TestNG allows you to extend its functionality by using plugins and extensions. Plugins are external libraries or modules that integrate with TestNG to provide additional features or functionalities. TestNG extensions, on the other hand, are built-in modules within TestNG that can be enabled or customized to enhance its behavior.
To use a TestNG plugin, you typically need to add the plugin's JAR file to your project's classpath or dependency management system. The plugin will then automatically integrate with TestNG and provide its specific features.
Some popular TestNG plugins include:
- TestNG ReportNG: Provides enhanced HTML reports with additional features such as pie charts, detailed exception information, and sortable tables.
- TestNG DataProvider: Enhances data-driven testing by providing advanced data source capabilities and support for various data formats.
- TestNG RetryAnalyzer: Allows you to define custom retry behavior for failed test cases, enabling automatic test case re-execution.
To enable a TestNG extension, you can use the appropriate TestNG XML configuration tags. For example, the <listeners> tag can be used to enable or disable specific listeners provided by TestNG.
TestNG plugins and extensions offer great flexibility in extending the functionality of TestNG and customizing it to suit your specific testing needs.
8. TestNG Integration with Selenium
8.1 Setting Up Selenium with TestNG
To set up Selenium with TestNG, follow these steps:
Download and install the Selenium WebDriver for your preferred browser (e.g., ChromeDriver for Google Chrome).
Create a new Java project in your preferred Integrated Development Environment (IDE).
Add the Selenium WebDriver libraries to your project's classpath.
Add the TestNG library to your project's classpath. You can download the TestNG library or include it as a Maven dependency.
Create a new Java class for your Selenium test cases.
Import the necessary Selenium and TestNG classes in your test class.
With the setup complete, you are ready to start writing Selenium test cases with TestNG.
8.2 Writing Selenium Test Cases with TestNG
Here's an example code that demonstrates writing Selenium test cases with TestNG:
javaimport org.openqa.selenium.By;
import org.openqa.selenium.WebDriver;
import org.openqa.selenium.WebElement;
import org.openqa.selenium.chrome.ChromeDriver;
import org.testng.Assert;
import org.testng.annotations.AfterMethod;
import org.testng.annotations.BeforeMethod;
import org.testng.annotations.Test;
public class SeleniumTest {
private WebDriver driver;
@BeforeMethod
public void setUp() {
// Set up the WebDriver instance
System.setProperty("webdriver.chrome.driver", "path/to/chromedriver");
driver = new ChromeDriver();
driver.manage().window().maximize();
}
@Test
public void loginTest() {
// Open the application URL
driver.get("https://www.example.com");
// Perform login
WebElement usernameField = driver.findElement(By.id("username"));
WebElement passwordField = driver.findElement(By.id("password"));
WebElement loginButton = driver.findElement(By.id("loginButton"));
usernameField.sendKeys("testuser");
passwordField.sendKeys("password");
loginButton.click();
// Verify login success
WebElement welcomeMessage = driver.findElement(By.id("welcomeMessage"));
Assert.assertEquals(welcomeMessage.getText(), "Welcome, testuser!");
}
@Test
public void searchTest() {
// Perform search
WebElement searchField = driver.findElement(By.id("searchField"));
WebElement searchButton = driver.findElement(By.id("searchButton"));
searchField.sendKeys("TestNG tutorial");
searchButton.click();
// Verify search results
WebElement searchResults = driver.findElement(By.id("searchResults"));
Assert.assertTrue(searchResults.isDisplayed());
}
@AfterMethod
public void tearDown() {
// Close the browser
driver.quit();
}
}8.3 Running Selenium Tests with TestNG
To run Selenium tests with TestNG, follow these steps:
Create a TestNG XML configuration file, e.g.,
testng.xml.Specify the test classes or test packages in the
<test>tag of the TestNG XML file.Customize the test configuration, such as parallel execution or test dependencies, using TestNG XML tags.
Run the TestNG XML file as a TestNG suite.
TestNG will execute the specified test classes or packages and generate the test results.
8.3. Data-Driven Testing with Selenium and TestNG
TestNG provides built-in support for data-driven testing, allowing you to execute test cases with different sets of test data. To perform data-driven testing with Selenium and TestNG, follow these steps:
Use TestNG's
@DataProviderannotation to define a data provider method that supplies test data.In the test method, specify the data provider method using the
dataProviderattribute of the@Testannotation.Inside the data provider method, create a two-dimensional array or an iterator that represents the test data.
Use the test data within the test method to perform various test actions or assertions.
Here's an example that demonstrates data-driven testing with TestNG and Selenium:
javaimport org.openqa.selenium.By;
import org.openqa.selenium.WebDriver;
import org.openqa.selenium.WebElement;
import org.openqa.selenium.chrome.ChromeDriver;
import org.testng.Assert;
import org.testng.annotations.AfterMethod;
import org.testng.annotations.BeforeMethod;
import org.testng.annotations.DataProvider;
import org.testng.annotations.Test;
public class DataDrivenTest {
private WebDriver driver;
@BeforeMethod
public void setUp() {
// Set up the WebDriver instance
System.setProperty("webdriver.chrome.driver", "path/to/chromedriver");
driver = new ChromeDriver();
driver.manage().window().maximize();
}
@DataProvider(name = "searchKeywords")
public Object[][] searchKeywordsProvider() {
return new Object[][]{
{"TestNG tutorial"},
{"Selenium WebDriver"},
{"Automated testing"}
};
}
@Test(dataProvider = "searchKeywords")
public void searchTest(String searchKeyword) {
// Open the application URL
driver.get("https://www.example.com");
// Perform search
WebElement searchField = driver.findElement(By.id("searchField"));
WebElement searchButton = driver.findElement(By.id("searchButton"));
searchField.sendKeys(searchKeyword);
searchButton.click();
// Verify search results
WebElement searchResults = driver.findElement(By.id("searchResults"));
Assert.assertTrue(searchResults.isDisplayed());
}
@AfterMethod
public void tearDown() {
// Close the browser
driver.quit();
}
}In this example, the searchTest method is executed multiple times with different search keywords provided by the data provider method searchKeywordsProvider.
Conclusion
In conclusion, this tutorial provided a comprehensive overview of TestNG, a powerful testing framework for Java. We covered various aspects of TestNG, starting from its introduction and benefits over JUnit. We explored the different annotations available in TestNG, such as @Test, configuration annotations like @BeforeSuite, @AfterSuite, @BeforeTest, @AfterTest, @BeforeClass, @AfterClass, @BeforeMethod, and @AfterMethod. We also discussed additional annotations like @DataProvider, @Parameters, @Factory, and @Listeners.